Monday, January 31, 2011

Top 10 Beginner Hiking Tips

1. Just do it.
    The largest hurdle in hiking is simply finding the time to break away and go hiking. Set aside a time once a week, or once a day to visit the park or forest.

2. Find a partner.
    Partners can help keep you motivated if you chose wisely. It's also safer to travel the wilderness in pairs.

3. Wear the proper shoes.
    For the beginning hiker, shoes are the most important piece of gear. Don't even think about taking flip-flops. Trail running shoes, ankle supporting boots, and full hiking boots are good. If you're just going to be going out in fair weather not carrying a pack, there's really nothing wrong with a normal pair of tennis shoes.

4. Go somewhere new.
    It gets boring to continually tread the same paths, explore state and national parks as well as local and county parks.

5. Get some exercise.
    Try trail running or cross country skiing if you're looking to get in more of a workout while you're on the trail.

6. Take the dog.
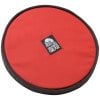
    Take the dog... need I say more? Try one of the awesome Granite Gear Flyers (frisbee) for your beloved four legged friend.


7. Track your progress.
    Share your hiking prowess with others using Endomondo, or Google's My Tracks for your Android smart phone. Track your progress yourself with a GPS, or use a SPOT Satellite Messenger to track and keep you safe. You have to purchase an additional package to track yourself on the trails using SPOT, but it will upload automatically to a web page where family and friends can watch your progress. Find it here.

8. Take a class.
    Most universities have an outdoor club or college. Usually they offer classes such as backpacking 101 and introduction winter sports classes. This would be a good way to get your feet wet so to speak in the outdoor sports and recreation world. Contact your local university to see if they offer community classes in outdoor recreation.

9. Wilderness First Aid.
    The American Red Cross offers Wilderness First Aid classes on a regular basis. Contact your local chapter to sign up for a cheap and lifesaving class.

10. Take it slow at first.
    There's no limit to how far you can go in the outdoor recreation world. But if you've never been hiking before, take it easy at first. Find flat terrain, short trails, and well marked blazes. Read other hiking articles around the net and get out there and try it!

Friday, January 28, 2011

Überlight Drysacks

Have you thought about using waterproof stuff sacks in your backpack? If you're an ultralighter, or even remotely concerned about your pack weight then you've probably dismissed drysacks since they add extra weight with little additional value. It's really simpler to just use a single liner to keep the whole contents of your pack dry, cheaper and lighter.

Having individual stuff sacks would be nice for organization and keeping individual items dry in your pack if it must be opened in adverse weather. Finally it looks like there are dry sacks that might be worth their added weight. Which is a real achievement when every ounce has to count. Granite Gear is a company that I've seen some pretty impressive products from recently. The Überlight Drysacks are see through, which makes it awesome to keep yourself organized.

Their Event Überlight Drysacks are similar except they have Event fabric on the bottom, a one-way vapor barrier that allows the dry sacks to remain flexible, waterproof, but also compressible. Just seal the stuffsack, and compress your clothes inside it. No wasted space storing air in your drysack.

For half the weight of nylon drysacks, and three times the strength according to their website, you can get the Überlight Drysacks. Only 3/4 of an ounce of material in a 18L drysack. Very impressive if you ask me. So next time you're out adventuring in the rain, keep organized and dry by investing in some of these innovative buggers.

Thursday, January 27, 2011

Les Stroud Divorce

I am a huge Les Stroud supporter, and I have recently noticed a search trend showing googlers looking up things like "Les Stroud Died" and "Les Stourd Divorce".

Les Stroud (Survivorman) is not dead!
He just released the Temagami in association with Helle. There is absolutely no reason to believe he is in anything but fine health. (Unless he has Giardia again).

Les Stroud is Divorced!
I originally believed Les Stroud was not divorced. A reader pointed me to his personal blog where a tiny entry is the only mention of his "separation" that I can find on the net. Les Stroud is, in fact, no longer married.

That's your Stroud News Update for the day. Get out there and adventure!

How Fake is Man Vs Wild?

Man VS Wild is this fake.

Tuesday, January 25, 2011

Neo Air Competitors: Peak Elite AC, Ether Elite 6, and SynMat

Don't have the money for the listed retail value for Therm-a-Rest's new NeoAir? It's $150 retail price and guess what Cascade Designs forgot to do again? They forgot to include a bag to put your NeoAir in. "That'll be $15 extra, please," says Cascade Designs in their ongoing low-blow marketing scheme. Come on guys, who sells an unfinished product? And we all know that's what an inflatable mattress without a stuff sack is: incomplete product. And if you haven't read all the bogus reviews, the frequency with which the internal baffles "pop" on the NeoAir is absolutely unacceptable for a mattress with a $150 price tag. Overall the NeoAir is too expensive, poor insulation, and terrible durability.
I'm going to do all of you NeoAir freaks a favor and expose you to a few more economical choices that rival, or surpass the features of the NeoAir. Here they are.


Pacific Outdoor Equipment Peak Elite AC
The POE AC has got the NeoAir beat hands down. It should be available early spring 2011. Here's the quick and dirty:


  • Peak Elite AC = 15oz (L) --->  NeoAir = 19oz (L)
  • Peak Elite AC has vertical baffles ---> NeoAir has horizontal baffles

        *Horizontal baffles allow the pad to conform to your body shape better and hold you in place

  • Peak Elite AC R Value is 4.4 under the torso and 2.5 on extremities ---> NeoAir R Value is 2.5
  • Peak Elite AC pad size 20"x78"x2.5" ---> NeoAir 77"X25"x2.5"
        *Peak Elite AC is narrower, however the vertical baffles help hold the sleeper on the pad, thus
          allowing the pad to be smaller while still being effective. Plus the shaved down size also shaves  
          weight.

  • Peak Elite AC and NeoAir are both manually inflated, meaning you must blow them up like a ballon.
  • Peak Elite AC pack size 4"x12" ---> NeoAir 4.5"x11"

Pacific Outdoor Equipment Ether Elite 6
Extremely similar to the POE Peak Elite AC, the "old" Ether Elite 6 has all the same features except it lacks the new "Radiant Heat Return" technology. So a slightly lower R Value. However the Large EE6 was priced at only $69 versus the NeoAir's (large) $169. That's a huge difference! And guess what? Pacific Outdoor Equipment didn't try to cheat us out of a stuff sack, they sell those with their products. Wow!


Exped SynMat Basic 7.5
Is now available for purchase! It's heavier than the others we've talked about but it's 3" thick instead of 2.5". Exped boasts an R Value of 4 for this mat which they rate down to -11º C (12º F). It comes in at 9.5"x5.7" packed and 71.5"x19" as a mat. It's narrower, yet, than the POE AC, and 6" narrower than the NeoAir.
Exped's sister series; the SynMat Pump is a bit heavier but has higher R Value and, you guessed it, an air pump to fill them up.

Saturday, January 22, 2011

Zen Habits

Zen Habits

A cool website I just stumbled across. This guy seems to write right on cue with my personal motivators and desire for simplistic lifestyle. He also seems to have good advice on how to manage an exercise routine and healthy lifestyle. I think I've just become a reader. :)

How to Become an Outdoor Guide

Thanks very much to Les Stroud I suddenly one day realized that my life's calling is to become a wilderness guide. Since then I have found myself tumbling through a variety of outdoor related activities, classes, certifications, and trips. Here I will lay out what I have come to understand as some fundamentals of getting your foot in the outdoor education and leadership door.

Experience
Nothing can replace experience, especially on an outdoor guide's resume. If you're applying to a backpacking leader position, you had better have a decent list of personal trips to prove that you have the fundamental skills necessary to be a backpacking guide. The same applies to any other type of outdoor leadership role from canoeing to rock climbing. Get out there and practice your outdoor skills!


Wilderness Medicine
It's a industry standard that outdoor guides and trip leaders have wilderness medicine qualifications. Your local chapter of the American Red Cross will offer Wilderness First Aid. This will usually suffice at first but true professionals in the field keep a minimum certification of Wilderness First Responder. Here's a list of wilderness medicine qualifications you might consider, from least in-depth to most difficult.


  1. Wilderness First Aid (WFA)
  2. Wilderness First Responder (WFR)
  3. Wilderness EMT (WEMT)
  4. Wilderness Paramedic (WEMT-P)
Of course you'll want to be lifeguard certified and AED & CPR, too. It's not necessary to become qualified in each of the four listed wilderness certifications. What I mean is, if you are a WEMT, then it is implied that you are also a WFR and WFA. Get it? Look for your wilderness medicine certifications from reputable companies, the biggest of these being NOLS WMI.

Outdoor Certifications
Certifications are becoming your friends, aren't they? On top of wilderness medicine certs, you're going to need activity specific certifications. For example if you plan to be a rock wall / high ropes leader at a summer camp, then it's almost guaranteed that you'll need a certification from ACCT. There is Swift Water Rescue  certification for anyone who plans to be a river guide, but often employers will provide the certification for qualified employees so check before you pay for it on your own. Technical and high angle rescue are great certifications to get if you want to be a climbing guide / instructor. There are a myriad more certifications that you might run into while exploring the outdoor leadership field, leave a comment with any others you've had experience with.

Where to Look for Jobs
Finding outdoor jobs and leadership positions is actually pretty simple. Landing the job is another matter.  Here are a few links that will help you find an outdoor position. Until you can land a year-round position (which are hard to find as an outdoor guide) you might want to consider working at camps and guide schools for the summer and spending your winters working ski resorts. Doesn't sound too bad, does it?

American Camp Association
Cool Works
Indiana Univeristy Outdoor Jobs Resource
Hiking Jobs
OutdoorEd

Outdoor Guide Degrees
If you're like me then you have a notion so deeply ingrained in you by society that you can't shake: you have to get a degree to be successful in the modern world. Maybe it's true, maybe not. Regardless, the outdoor education and guide service industry has grown large enough to have actual degrees offered by universities and colleges around the world. You can get a Bachelor's in "How to be a cool wilderness guy". That's pretty cool if you ask me. Central Wyoming College has an entire section of outdoor education degrees here. Central Wyoming's programs are set up to be half in the classroom and half NOLS courses. You have to take NOLS courses to pass college??? Yes. There are several other major universities and colleges offering outdoor education and leadership programs.

NOLS & Outward Bound


If you've thought about being a trip leader or outdoor educator then you must already know about both of these. Right? They're the holy grail schools of wilderness education. They offer recreational endeavors, as well as courses training people who want to be outdoor educators and leaders. NOLS has several and they call it "Teaching the Teachers". They have hefty price tags but to outdoor employers, nothing says qualified like a NOLS semester. Especially when combined with person experience, and a outdoor education degree.

I hope you all find this useful, leave comments with questions or input. If you're a professional in the field tell us what helped you and what you'd suggest for the newest outdoor educators and leaders. Good luck all!

Friday, January 21, 2011

Outdoor Parks and Recreation, Lansing Michigan

As an outdoor enthusiast living in the Lansing area (since I was born), I've come to a stark realization. If one travels two hours north, you'll find outdoor area such as Boyne Mountain, Gladwin State Forest Area, Manistee National Forest, and Huron National Forest. To the south we find Red River Gorge, KY a huge rock climbing destination, and Mamoth Caves, KY. In the Upper Peninsula we find that between Sault Ste. Marie State Forest Area, Hiawatha National Forest, and Ottawa National Forest most of the U.P. consists of public recreation lands. But what's near Lansing? Unfortunately, not alot.

As far as recreation areas go there are a few, the best being Waterloo and Pinckney State Recreation Areas. These are connected together by one lower Michigan's best backpacking trails: The Waterloo-Pinckeny Trail.

Almost in Lansing is Rose Lake State Wildlife Research Area. This is 4,140 acres of great land for outdoor enthusiasts who find themselves shored up in Lansing.

For those who are closer to Eaton Rapids, Charlotte, or Holt Michigan then perhaps William M. Burchfield Park is a better fit. This is an Ingham County Park and will charge you $2 per car per day on most days. If you'd rather not pay the entry fee then check this map and you'll find that Burchfield (sometimes known as Grandriver) Park is connected to Riverbend Access Site, and McNamara Landing both of which have free parking from sunrise to set. So unless your business is actually in Burchfield park, try parking at one of the access sites and walking, biking or canoeing in. Did I mention that when there's no snow on the ground, Burchfield has some of the best mountain biking trails in lower Michigan. Burchfield park has ski rentals and snow tube rentals during the winter, however the classic toboggan hills have been closed until further notice due to lack of funding. Burchfield park rents canoes and provides canoe trips and kayak trips during the summer months.

Fenner Nature Center in Lansing has a good amount of land available for outdoor recreation. There are a few miles of trails available in this private non-profit area. You will almost always stumble across a flock of turkey or a deer or two. They have an education center, great for the kids, and are definitely worth your time for a quick escape into the "wilderness" in the city.

Good luck finding the right place to enjoy the outdoors in Lansing, Michigan. There are other minor parks and wilderness areas, but I didn't find them worth mentioning. I'd suggest you head away from Lansing any time you can to find the wilderness. Good luck!

Thursday, January 20, 2011

Les Stroud's The Temagami Knife Review


Video Released 4/19/2011


NOTE: This article was written prior to the release of the Temagami as an analysis of the (then) released information about the knife. The Adventure Lifestyle Blog has received the Temagami and will release a new and current full review of this knife soon. Suffice it to say that a lot of the speculations I made herein are now irrelevant and incorrect as the final production version of this knife rolls off the line. Watch the video above to see the knife and our video review, released 4/19/2011.

Funny that I just posted on Bear Gryll's partnership with Gerber. I got an email from Les Stroud today offering pre-sales on his knife: The Temagami. This isn't a surprise, the knife has been in the works for quite a while. Les chose to partner with an international knife maker from Norway. The country chosen to do the work instantly buys my confidence, Norway is a European company with a good reputation and superb craftsmanship. The company, Helle, is one I have never heard of but it doesn't matter too much what company produces the knife so long as they follow good bladesmithing procedures. The Temagami appears to be a good knife. According to Les's site the knife has a "birch handle that's oiled with linseed". I like the look of a good wooden handle on a non-serrate carbon steel blade. Especially since they chose to put solid brass rivets in with it! Birch isn't the most durable wood ever but the colors compliment the brass and polished high carbon steel. 


Les's site also claims the blade is made of "carbon steel laminate". We can only guess as to what they actually meant by this but I assume that what they're getting at is trying to convince people that the blade is made of folded high carbon steel. Hooray! Oh wait... The necessity of folding steel to distribute carbon content equally died with the invention of the modern process of making making steel. Is it necessary to fold modern compounds of high carbon steel to make a better blade? Absolutely not, and if you're under the impression that a folded steel blade is better than one that isn't... well please go do your research.


They included "custom groves on the back of the blade" to facilitate fire-steel striking. That's not a bad idea, really, but first of all it's "the spine of the blade" not "the back". Second of all, where's the grooves on the spine where the tang meets the handle? I've had these on previous knives and they increase one's ability to handle the knife significantly by adding a good friction point to prevent slipping of the thumb. Speaking of slipping... a smooth wooden handle is prone to slipping of the hand on any stabbing actions. There's a rather small out-crop of wooden near where the bolster should be on this knife that acts as a slight barrier between the handle and the dangerously sharp blade, but not much. That's a little concerning, but if one handles the knife responsibly it should prove to be little problem.


The tang is almost a full-tang, in fact it's so close that I would rather just call it a full tang. You can see that it tapers narrow at the end because it's not visible through the whole witch of the pommel of the knife. This does not mean the knife is any weaker than a true full tang knife. It's obviously got a wide tang that protrudes back several inches through the handle as we can see that the two (I'm guessing here) 3/16" brass rivets are spaced a good distance apart and must both travel through the tang to sandwich the handle to it. It most likely then tapers slightly upwards and ends (where we can see it) at the pommel. The lanyard eyelet is a third, well placed, rivet. not only does it provide a place to put a lanyard, it gives the Temagami a third rivet in it's already beefy full-tang handle. Really solid construction if you ask me!


Les's decision not to include serrations gets this knife another thumbs up in my book. I hate serrated knives! What a waste of blade space. If I could somehow get my hands on the exact specs of the steel used for the blade and the heat treating processes they followed to manufacture these, I would be more confident in my review of this knife. However, let us assume that they heat treated this steel perfectly, and furthermore that the steel used in the blade is of the proper quality (this could be one of any number of different steel types). If we assume this to be true, then I would say this knife is a winner. Les Stroud's Temagami Knife gets five stars in my book.


You can pre-order this knife now from his website, available Feb 26th for $180 excluding shipping. If you're thinking about ordering this, let me tell you a secret... It's not worth the price. Unless you're ordering it for the sole reason that it's got Les's name on it, you'd be better off investing your money elsewhere. There are plenty of comparable knives for less money. But there are also plenty of poorer quality knives for more money... So I leave the decision for you, readers.

Wednesday, January 19, 2011

Gerber Makes Bear Grylls Knife

Gerber 31-000751 Bear Grylls Survival Series Ultimate Knife, Serrated EdgeIt is a sad day for me. My most cherished knife brand, Gerber, has decided to endorse and produce knives that have the names of survival idiot Bear Grylls on them. OUCH! Why would you do that, Gerber? For any of you who need a refresher on why Bear Grylls is the biggest idiot to ever set foot on television and the great outdoors simultaneously, I will release a post explaining it shortly. I've always loved Gerber because they combine quality with affordability. Until now they've been a brand that sells quality and not a label. Although the "Bear Grylls Survival Series Ultimate Knife" (ultimate knife? a bit bold, don't you think?) has the makings of a good knife (one piece through tang, one piece synthetic handle, sheath, lanyard) it has one fatal flaw. They put the words "Bear Grylls" on it, which is one of the fastest ways to get yourself killed in the wilderness. Nobody shows off more numerous or creative ways to kill ones self while trying to live in the wilderness than Discovery Channel's favorite... Bear Grylls. Therefore we can assume that any time you run into someone carrying this knife, they're probably a Bear Grylls fan. And while it's possible to be a fan of his show and have the vaguest hint of an understanding about correct wilderness survival... it's highly improbable. Don't be too quick to trust someone with a Bear Grylls endorsed product as they most likely wasted money on buying an item with his name on it, and are probably almost as full of ego as Bear Grylls himself!

Tuesday, January 18, 2011

How To Make Flamethrower Exhaust - ATV Quad

By reading this you WILL learn how to make your exhaust shoot flames.


I accept no responsibility for any injuries related to replicating my system. This is for instructional purposes only. Do not try this at home. Wink wink... You will learn how to make a flamethrower exhaust using propane and a grill ignitor. A flashback arrestor would be a good addition to this setup, however I opted not to spend the money on it as there are other insurances that the flames won't travel back up the hose (detailed later in this guide). This is by far the most complete and (as far as I can tell) really the only tutorial on how to make a flaming exhaust on the web. I couldn't find any decent practical advice on how to do this, just a bunch of forum threads asking if it's possible. So here's your answer.

Things you will need:


  1. Gas ball valve
  2. 1/4 gas hose ~ 10'
  3. Various Brass Fittings
  4. Mr Heater #F273754 1/4" Male Pipe Thread
  5. Battery Grill Ignitor
  6. Disposable 1lbs propane cylinder
  7. A decent selection of tools
  8. Teflon Thread Tape
  9. Balls.


I bought all of these from the local Menards store, Lowes did not have the disposable cylinder to 1/4" male adapter. I would suggest you buy these parts at your local store since they were much cheaper there than online. I just provided the links so you can see what you need to get. The brass fittings will have to be selected to fit the scenario in which you are working, I got help from a store employee who knew a lot more about brass fittings than I did. I simply told him what I needed to fit where and he took care of the rest. Expect to spend $40-$50. The biggest hitters were the sparker ($16), the gas ball valve ($8), and the cylinder-to-male adapter ($8). 

This isn't going to be the exact same process for everyone, and I have no idea how different exhausts, engines, carburetors, etc will react to this modification. It was a no-brainer for me because the ATV is old and dying anyways and I often perform mad-science experiments on it. Be careful that you don't permanently ruin your vehicle! The hole in the header pipe is irreversible (unless you weld a patch over it) and it may require you to re-jet the more finicky carbeurated engines. If you want to do this to a vehicle such as a car or truck, you'll need a 20lbs propane tank, different adapters, flashback arrestors (so your car doesn't turn into a bomb) and a little sense of adventure/death wish. The general concept here will remain unchanged no matter what you try this mod on. DO NOT TRY THIS WITHOUT THE ENGINE RUNNIG! Having exhaust gasses mixing with and carrying the propane out of the exhaust pipe is vital to prevent the flames from traveling back up into the header pipe and eventually finding their way back to your propane bottle. This could potentially cause an explosion even though propane needs oxygen to burn, and I doubt that it would ignite inside of the tank (oxygen-less environment) but I suggest you don't find out.

I'm not going to explain every tool you will need and exactly where and how to do the drills and cuts. For this reason, if you don't have enough ingenuity to understand what tools and what techniques to use to do this: don't even try it. You'll probably just kill yourself.

Use thread tape on all fittings to prevent leaks of propane gas!!!

How to:

Here's the general concept:

Setup Secured Between Handlebars (black sparker button)
The propane bottle is your fuel source (don't try MAPP gas, it doesn't work very well). The gas ball valve gives you the ability to control when the propane mixes with your exhaust. The ball valve is fitted with a barbed adapter on the out-going end to attach to some 1/4" hose that will run to your header pipe, just in front of the muffler. There, you will drill a hole and insert another brass barb fitting to accept the 1/4" pipe bringing the propane to the exhaust. The propane will mix with the exhaust gasses as they exit the muffler, and be ignited by the electric grill sparker at the exit of the muffler.


Here's the breakdown:

Disposable Cylinder to Male 1/4"

Gas Ball Valve
Brass Barb Fitting to 1/4" Hose
If you've been paying attention then you know that (as the propane gas) our journey now continues into the 1/4" hose. Where does this hose terminate? At the other brass barb fitting that is inserted into the header pipe just before the muffler. Here's the picture of that part.

Header pipe coming from the right, to muffler left. Brass barb clearly visible.
There is the potential here for the exhaust gases to heat up the barb/hose enough to melt the hose. If this become a problem for you, then get braided steel hose, or make a more elaborate joint here to diffuse the heat conduction through the brass.

Now we move on to rigging up the sparker. I suggest you stop at this point and test your rig by lighting with with a sparkler or some constant flame source rigged behind your tailpipe. I used a propane torch duct taped to a 6' stick. Once you know that your exhaust is indeed flammable, then you can proceed to lighting it by spark. Expect a flame two feet high, and a foot or so horizontal to the ground. Check the video to see an example of this rig in action so you have an idea what you're going to be getting yourself into!

You could most likely work this rig with a piezo manual ignitor, but you'd better be able to push that button really fast! The exhaust usually takes a few sparks to catch and you don't want explosive propane fumes building up while you're trying to get it lit. The battery powered models come with the insulated electrodes you'll need to effectively light this baby up and they provide a steady stream of sparks between the electrodes for as long as you hold down the button. The way you work this onto your vehicle is up to you, I can't presume to give you instructions on that. You'll need a little intuition and ingenuity to figure it out.
Sparkers Attached to Expanded Metal Exhaust Modification
Sparkers have a 3/8" Gap as Suggested by Manufacturer

The Battery Sparker is Shaded "Puke" Color, Wires connect it to Electrodes in Muffler
Now all you need to do is test your electrodes, ensure they're insulated from any grounding metal, check that there's a spark jumping between the tips reliably. You could set up the sparkers differently, say by drilling into the muffler right at the end or by welding on a couple of brackets to hold the electrodes at the end. Just be sure that wherever your spark is jumping is where the propane has had a chance to mix with the air to get oxygen. It won't ignite otherwise. So don't drill into the side of the muffler and put your electrodes in there, the propane won't ignite! Notice how my own electrode sit a few inches past the muffler's end? Also watch out that your wires are protected from the flames. That would put a quick end to your adventure.


That's all there is to it. Please comment to ask me any questions you have about making your own propane exhaust. I am not a chemist, I don't work for propane companies, I have no plumbing or gas working experience. Just a pair of balls and a workshop... oh and an old ATV to test things on! I hope you enjoyed this tutorial on how to make your own flamethrower exhaust using propane!

Spooferman Fire-Starting Winners Announced

spOn January 11th, 2011 the winners of Les Stroud's Spooferman fire-starting video contest were announced via email and posted to the spooferman website there were three winners and three honorable mentions. Apparently Les Stroud and his team didn't like my video :( but I'm sure you guys all did. You can find it here . The winners of this Spooferman contest received various promotional items from Les's personal line of gear and apparel as well as some camera equipment from Sony. Some very NICE camera equipment if you ask me. Bes Proud came in first, followed by Fire Quest, and then Stress Loud. Go ahead and hit up the Spooferman page and watch the winners.

Spooferman Fire-Starting Contest Winners

Sunday, January 16, 2011

Dough so fresh...

Banff Mountain Film Festival World Tour 2011

In case you were wondering what the Banff Mountain Film Festival World Tour is, I'll fill you in. Banff National Park is Canada's oldest national park. The Banff Mountain Film Festival World Tour is a celebration of outdoor lifestyle, mountain culture, mountain sports, and a gathering of badasses who appreciate and experience the wild places of the world in extreme ways. Each year the Banff Film Festival is held in early November and then the films, literature, and experience is off to travel the world. One city at a time. For the most part it is brought to each city by a group of volunteers and affiliates, outdoor clubs and businesses. People attend the event to see the new films and literature, gear and lifestyle of a new year in mountain events. Big names like The North Face, Outdoor Research, and MSR are sponsors this year and each local festival gathers local sponsors on top of that.  Get out and see what's going on at your local Banff festival when it comes around! Check here to see if it will be in your city. Get involved and bring the Banff festival to your town.

Saturday, January 15, 2011

Avoiding Name Brands

    The North Face, Arc'Teryx, Mountain Hardwear, these are some of the boldest name brands in outdoor clothing right now and they carry the boldest price tags. For what? The other day I was walking through Dick's Sporting Goods, a popular outfitter (although their selection and employee knowledge are severly lacking) and noticed a Mountain Hardwear down jacket. 800 fill, and naturally I played the "guess the ridiculous price" game with myself. I wasn't surprised to see the price at over $200. Then I looked down at myself and noticed my own 750 fill down jacket. One I got for christmas, Eddie Bauer brand, from the local outlet store, no doubt for less than one hundred dollars. The loft difference was impressive, it was obvious my cheaper Eddie Bauer had twice (or more) the loft of the Mountain Hardwear jacket, in fact, I found it hard to believe that with less than 1/2" of down loft the Mountain Hardwear jacket could keep anyone warm, let alone be worth it's outrageous price tag.
    If you are a supporter of expensive brands, or have ludicrous amounts of money to spend on gear, then you'll probably argue that the Mountain Hardwear jacket is worth it. There must be some huge hidden factor (like warmth-Gnomes hidden in the stitching) that I am missing to make these prices worth it. Just take a look at this page of North Face Fleeces on google's shop North Face Fleece. Now compare it to Nike's ACG brands ACG Fleece. ACG's answer to Mountain Hardwear's Monkey Man (Woman) fleece goes for only $75 whereas MH's price is $150. What are you paying for; brand or function?

       Expensive Brands                                                        Alternatives

Mountain Hardwear                                             Outdoor Research

North Face                                                            Nike's ACG Line

Arc'Teryx                                                Anything is cheaper than Arc'Teryx

Therm-a-Rest                                                     Pacific Outdoor Equipment

Tips for Saving:


  1. Buy on sale or clearance
  2. Join a local outdoor club and get discounts!
  3. Rent gear you won't use often
  4. Buy gear during the off-season, it's a lot cheaper (supply vs demand)
  5. Join outfitter's rewards programs
  6. Look for coupon codes for online stores
  7. Join mailing lists, companies often send out exclusive discounts